How to Make a Shadow Puppet Theater
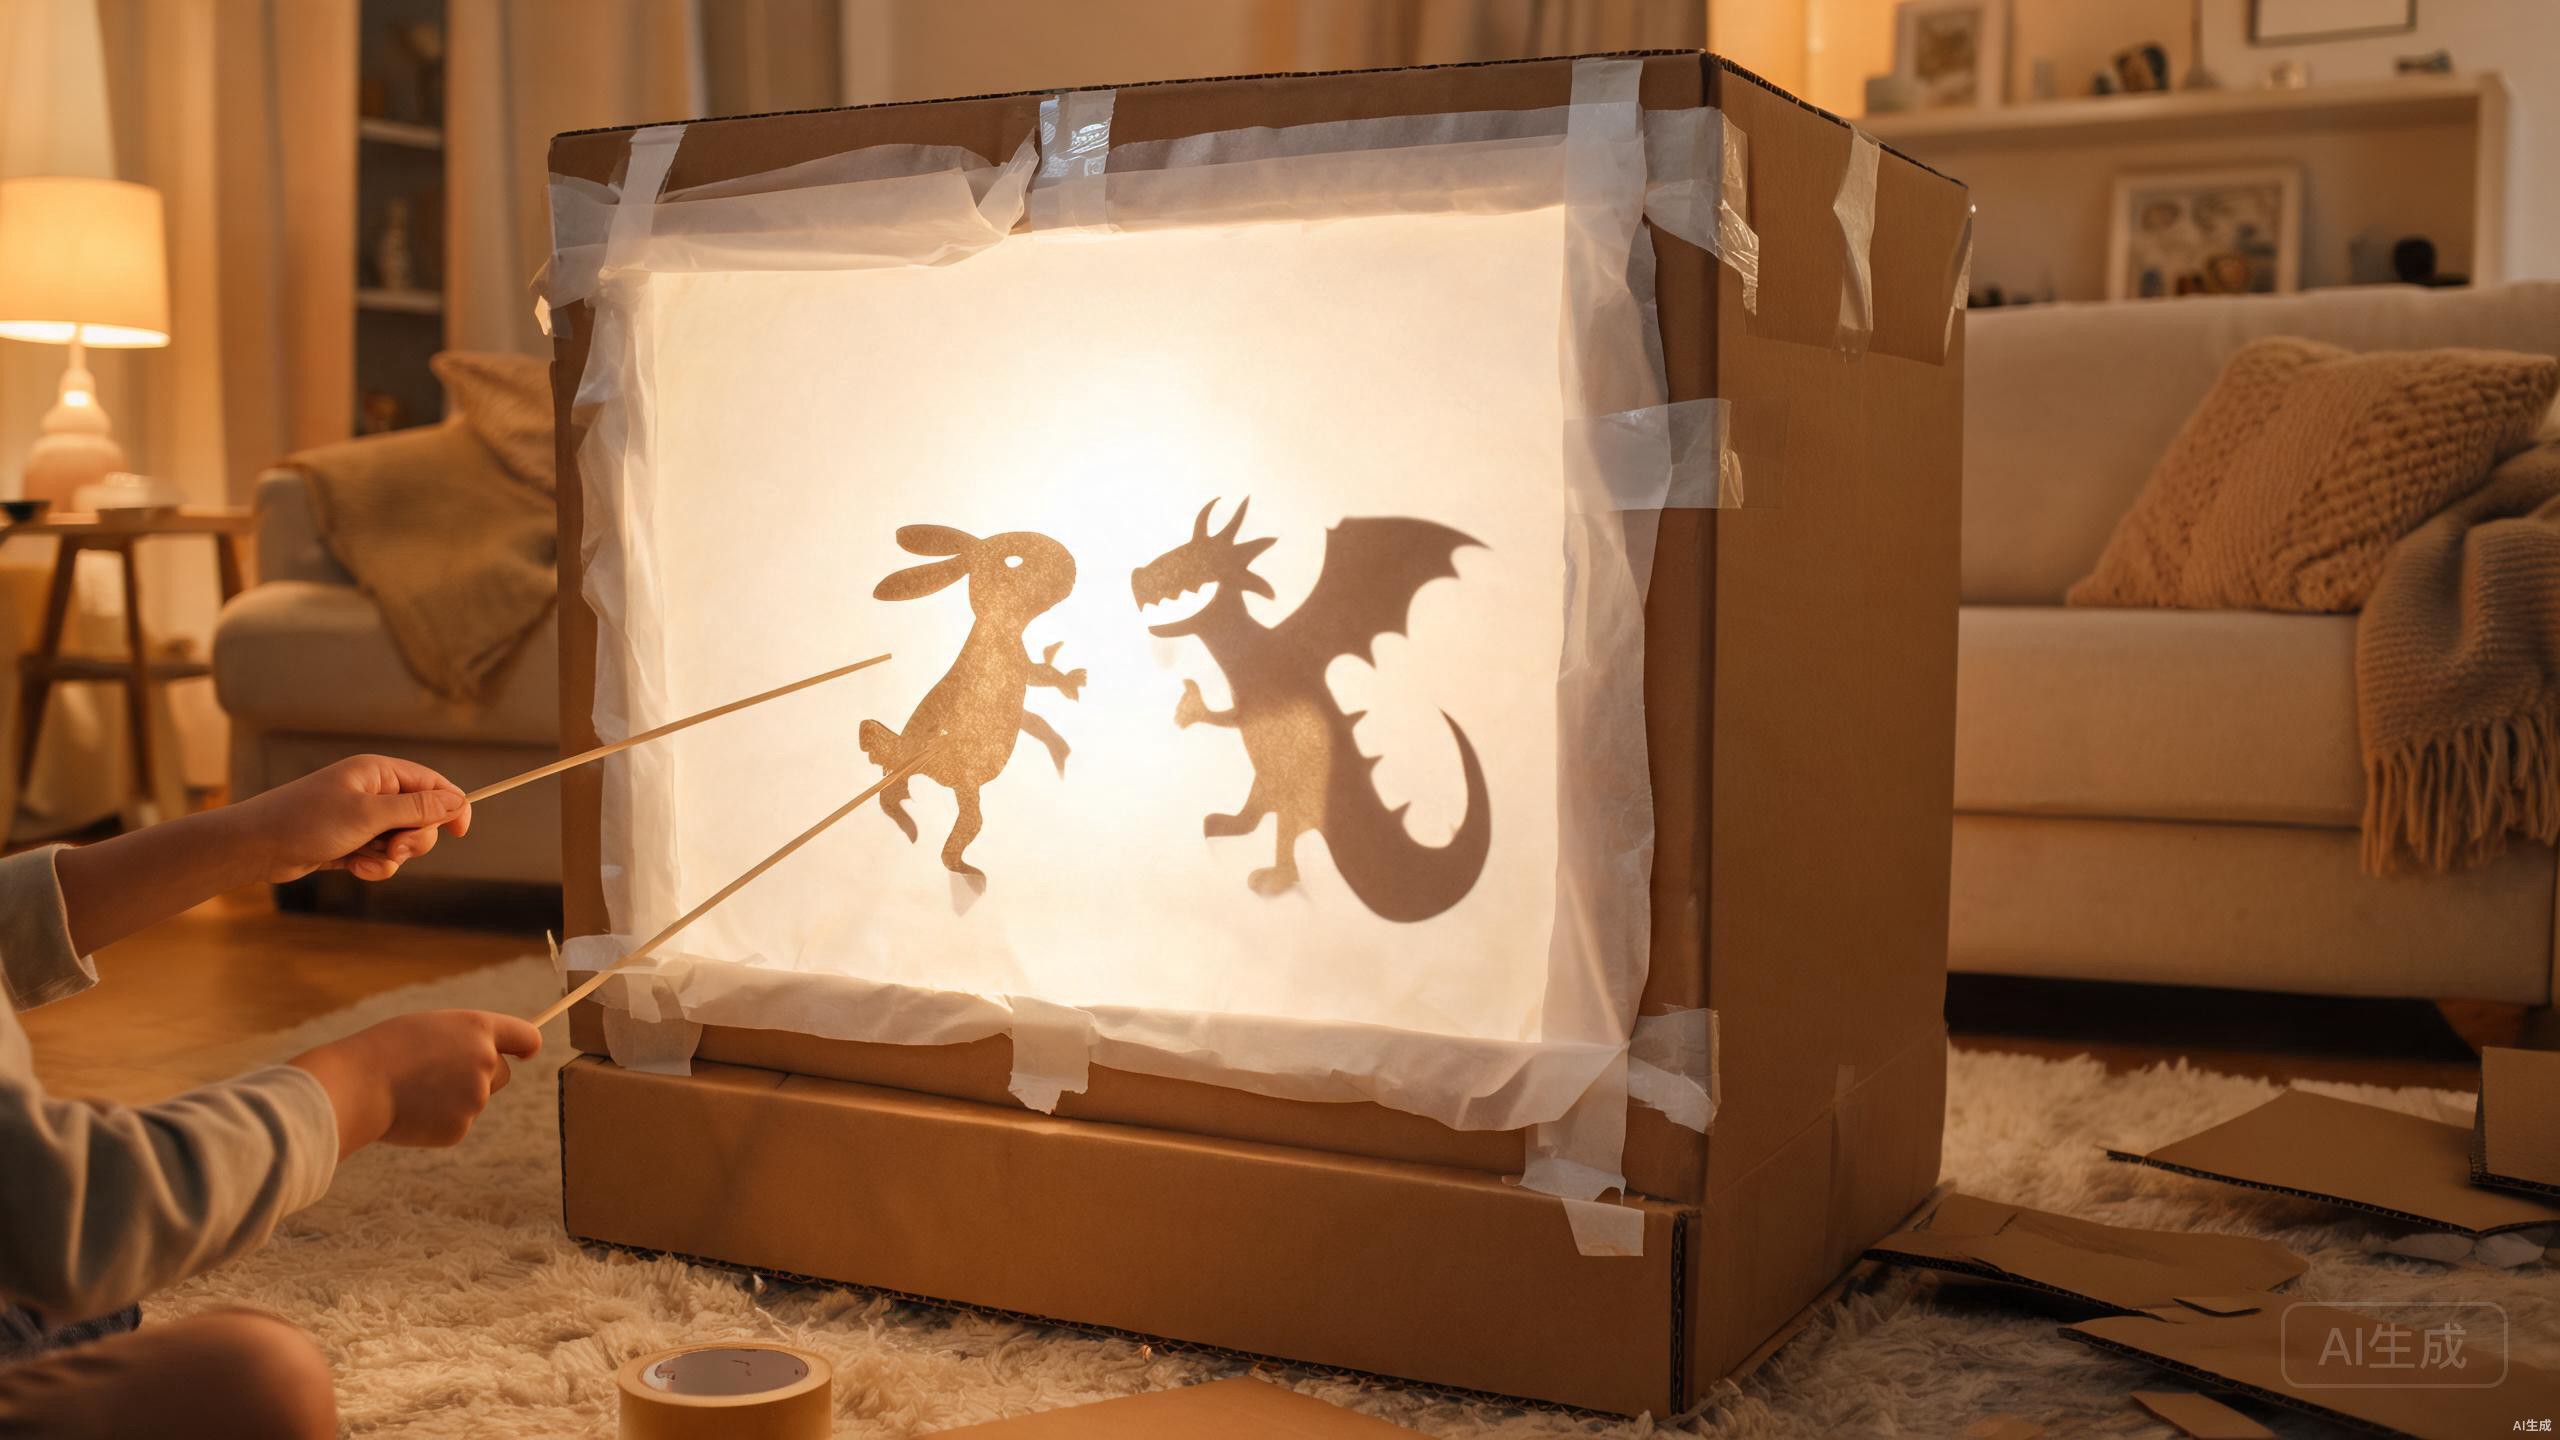
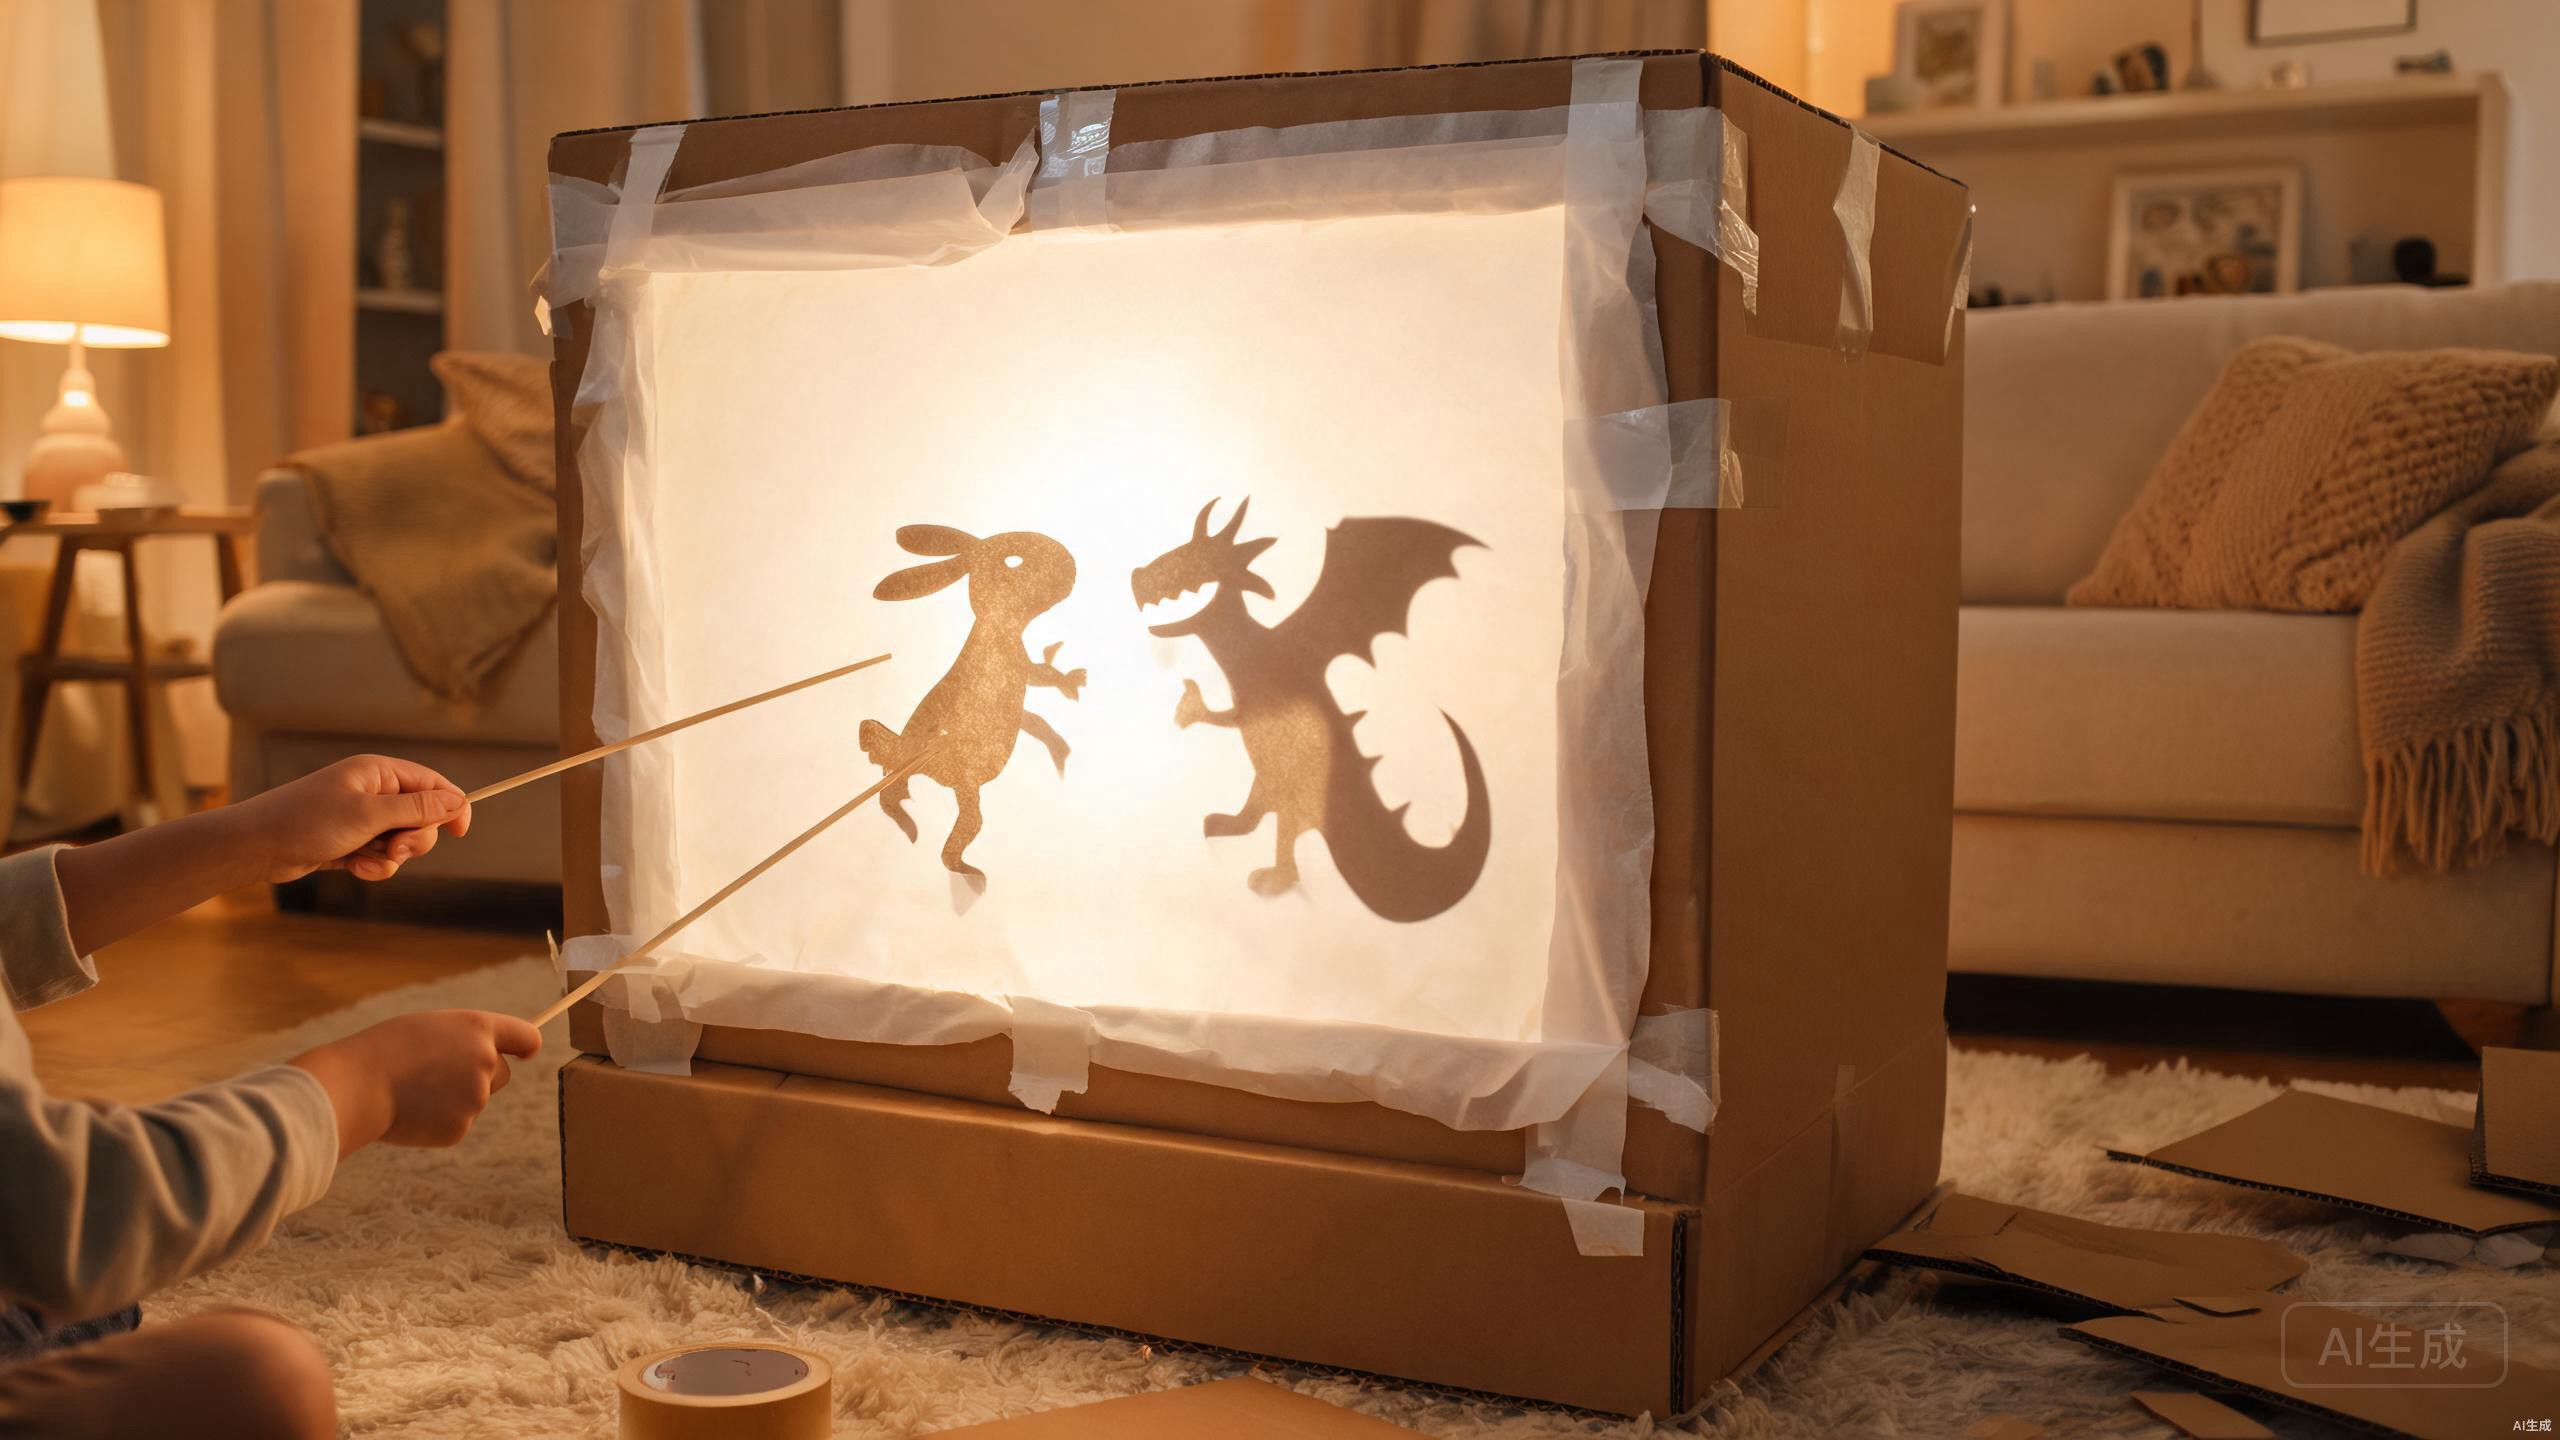
You can build a working shadow puppet theater in about 30 minutes using nothing more than a cardboard box, some tissue paper, and a desk lamp. This simple DIY project is the perfect foundation for storytelling at home, in the classroom, or at a library program—and once you understand the basic construction, you can scale it up or down to fit any space or age group. Follow the steps below and you’ll be ready for your first performance before the lamp has even warmed up.
Materials You’ll Need
- 1 large cardboard box (appliance box, moving box, or shoebox—see size options below)
- White tissue paper or parchment paper (for the screen)
- Box cutter or craft knife
- Strong tape (packing tape or duct tape)
- LED desk lamp (cool-to-touch, adjustable neck)
- Scissors
Step-by-Step Instructions
- Cut an opening in the front of the box. Stand the box upright and use the box cutter to cut a large rectangular window on the front panel. Leave a 2-inch border on all sides so the box keeps its shape. A typical window measures about 12 × 16 inches for a medium box.
- Tape tissue paper over the opening to create the screen. Cut a piece of tissue or parchment paper that is 2 inches larger than the window on every side. Pull the paper taut and tape it flat across the back of the opening. Smooth out wrinkles as you go—a tight, flat screen produces the crispest shadows.
- Cut a back opening for the puppeteer. On the rear panel of the box, cut a door or slot large enough for your hands and puppets to pass through. A horizontal slot works well for rod puppets; a full back-panel flap works better for hand puppets.
- Set up the LED lamp behind the screen. Position your LED desk lamp inside or just behind the box, shining directly at the tissue paper screen. Aim the beam flat and centered, roughly 8–12 inches from the screen. Make sure the lamp is not touching the paper.
- Decorate the theater exterior. Use markers, paint, construction paper, or wrapping paper to dress up the outside of the box. Add a paper curtain, a marquee sign, or a title banner across the top. This is a great step to involve kids.
- Test the theater with a puppet. Turn off the room lights, switch on the lamp, and try a puppet from the back opening. Adjust the lamp angle and distance until the shadow is sharp and centered. If the shadow is blurry, move the lamp slightly closer to the puppet and farther from the screen.
- Secure and stabilize the theater. Tape the bottom of the box shut and weigh it down with a book inside the base if it tips. For long performances, tape the box to the table edge.
- Dim the room and perform. The darker the room, the more dramatic the shadows. A single lamp in a darkened room gives the cleanest silhouette and the most magical effect.
Tips for the Best Shadow Projection
A few small adjustments make a big difference in image quality:
- Lamp positioning: The lamp should sit behind the puppeteer, between the puppets and the screen, not behind the screen itself. Aim the beam perpendicular to the screen for even lighting.
- Screen tension: A loose screen sags and distorts shadows. Re-tape the paper tightly, working from the center outward to avoid bubbles.
- Room darkness: Any ambient light washes out the contrast. Close curtains, turn off overhead lights, and avoid lamps shining on the audience side of the screen.
- Lamp choice: Use a single, focused LED bulb rather than a diffused lamp. Multiple bulbs create double shadows. A cool LED is safer near paper than an incandescent bulb.
- Puppet distance: The closer the puppet is to the screen, the sharper and smaller the shadow. Move puppets farther from the screen to make them larger but slightly softer.
Size Options for Every Space
One of the best things about this design is that it scales easily to whatever box you have on hand:
- Small (shoebox): Ideal for tabletop performances and individual play. The window is about 6 × 8 inches, perfect for finger puppets and small cut-out silhouettes. A small clip-on LED light is sufficient.
- Medium (moving box): The most versatile size for home use. A standard moving box gives a 12 × 16 inch screen that fits two or three puppets at once and works well for family story time.
- Large (appliance box): Best for classrooms and stage performances. A refrigerator or washing machine box can host a 24 × 36 inch screen—large enough for full-body puppets and multiple performers. Use two lamps for even coverage.
Classroom Adaptation: Six Theaters for a Class
Building shadow theaters as a class project is affordable and manageable. To make six theaters for a typical class of 24–30 students (4–5 kids per theater), you’ll need six medium moving boxes, a roll of parchment paper, two rolls of packing tape, six clip-on LED lamps, and a box cutter for the teacher to use. Pre-cut the front windows and back slots before the lesson to save time and keep kids away from blades. During the activity, each group tapes their screen, decorates the exterior, and tests their lamp. Assign roles—puppeteer, narrator, lamp operator—to keep everyone involved. The full classroom build takes about 45 minutes, leaving 15 minutes for a group performance. Total cost per theater is under $5 if you reuse lamps and tape.
Recommended Materials
The following are the materials we use in our own builds. These are affiliate links—if you buy through them, we earn a small commission at no extra cost to you.
🛒 Materials Shopping List
Frequently Asked Questions
What’s the best material for the screen—tissue paper or parchment paper?
Both work, but parchment paper is more durable and produces slightly sharper shadows because it diffuses light more evenly. Tissue paper is cheaper and easier for kids to handle, but it tears more easily and may need replacing after several performances. For long-term use, choose parchment paper. For a quick one-day project, tissue paper is fine.
What kind of lamp should I use?
Use a single LED lamp with a focused beam—either a clip-on desk lamp or an adjustable neck lamp. Avoid incandescent bulbs, which get hot and can be a fire hazard near paper. Avoid lamps with multiple bulbs or frosted diffusers, since they create overlapping or fuzzy shadows. A 5–10 watt cool white LED gives the cleanest silhouette and stays safe to touch.
What age is this project suitable for?
The theater itself can be built by kids ages 8 and up with adult supervision for the box cutter. Younger children (ages 4–7) can help with taping the screen, decorating the exterior, and of course performing with puppets. For a classroom setting, the project works best for grades 2–6. Toddlers can enjoy the finished theater as audience members or with simple pre-made puppets.
Keep Building
Now that your theater is ready, take it further with these related resources:
- 📥 Free shadow puppet templates – Download printable character silhouettes to cut out and use right away.
- 📚 Lesson plans for educators – Curriculum-aligned activities that pair storytelling with shadow puppetry.
- 🛠️ Recommended materials guide – In-depth reviews of papers, lamps, and puppets for every budget.
Happy building—and don’t forget to dim the lights. The magic happens in the dark.